There's something undeniably satisfying about making pizza with fire. Outdoor pizza ovens bring flavor, fun, and just the right amount of mess to your backyard. If you're new to the scene, don't worry, this isn't reserved for pros or culinary risk-takers.
Your first pizza night should feel exciting, not overwhelming. From preparing dough to managing heat, every step becomes easier with a little planning. The first sessions may feel intense. However, with a correct setup and a few smart habits, you can transition from stress to rhythm in just one cook.

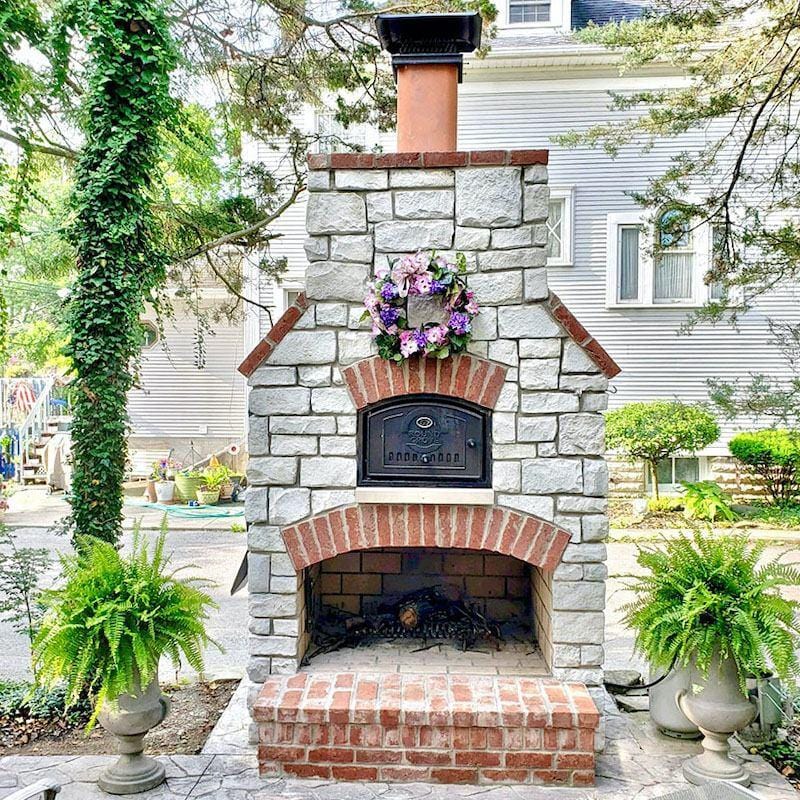
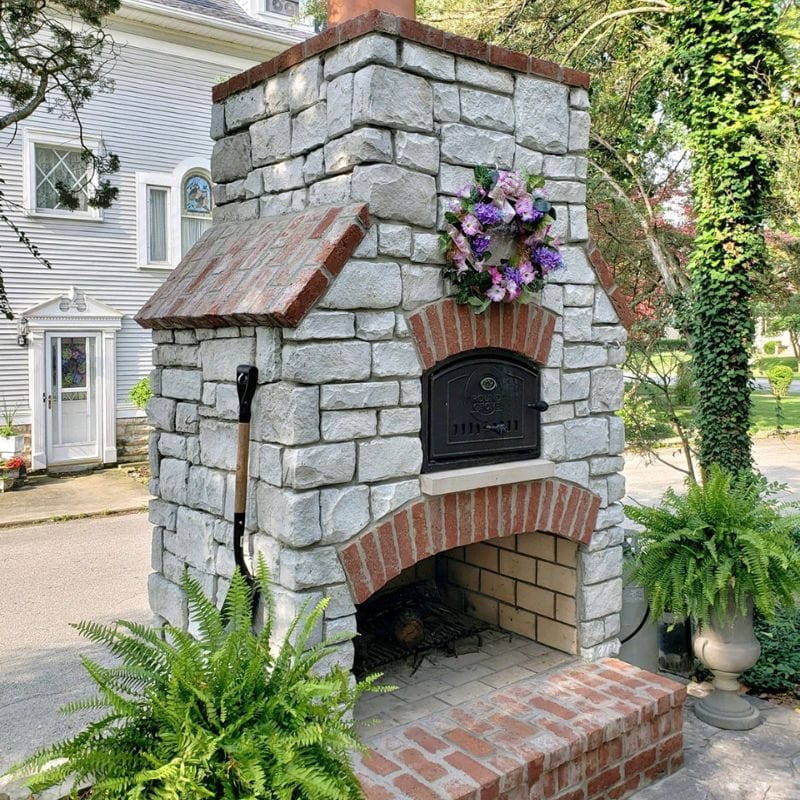
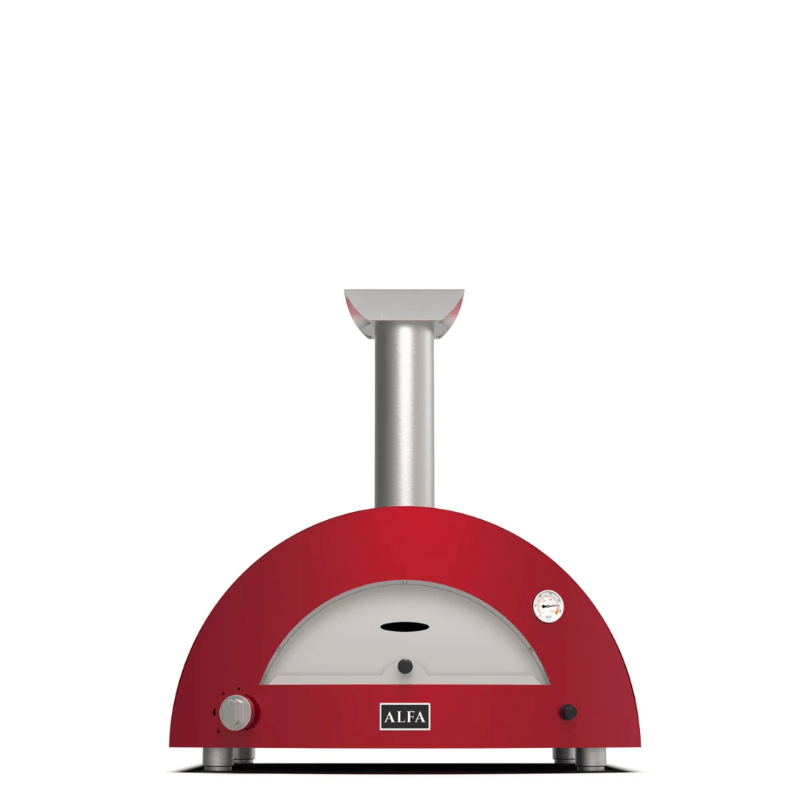
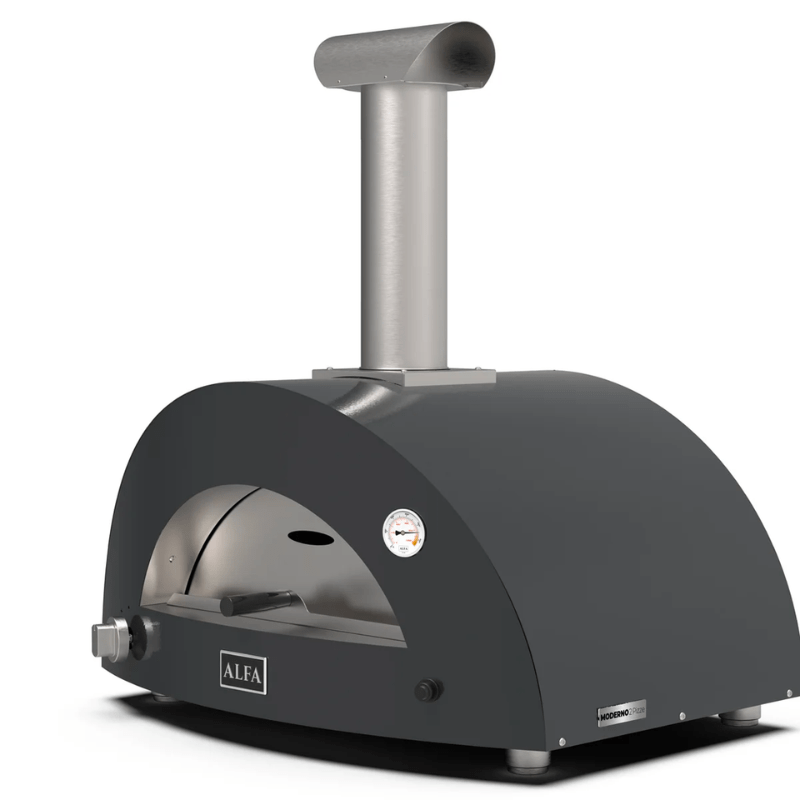
Pick the Right Oven and Fuel
Select an oven that suits your space and cooking style. Portable models heat fast and store easily. Heavier, insulated domes maintain a stable temperature for long sessions and larger groups. Look for a thick stone or cordierite deck, a well-designed vent, and tight seals. Those details produce even heat, steady flames, and a deck that recovers quickly between pies.
Oven Fuel
Fuel shapes flavor and workload. Gas runs clean and offers precise flame control with a dial. Wood brings aroma and a lively flame that kisses the crust, yet it demands attention and dry hardwood. Some ovens accept both fuels, which gives you flexibility. If you pick wood, stick with seasoned oak, maple, or fruitwood. Skip softwoods, scrap lumber, and surely anything painted.
Pizza Oven Size
Match size to your party. A 12-inch deck suits family nights. A 16-inch deck gives room for larger pies or a cast-iron pan for sides. Measure your counter or cart before you buy. A level, heat-safe surface and a wind-aware placement make the first session smoother.
Set Up Your Station Like a Pro
A clean, logical layout keeps pizza night calm. Keep a small sanitation station next to your dough bench, and use disposable gloves when you portion raw sausage or toss hot chilies. Set three zones: dough and shaping, topping, and hot zone by the oven.
Keep peels, flour, and toppings within a single step of the shaping area. Keep your infrared thermometer and turning peel right by the oven opening for easy access. Add a small trash bin and a damp towel at the bench so you can reset quickly.
Choosing the right tools
A wooden or composite launch peel releases dough more easily. A thin metal turning peel rotates pies without dragging toppings. Keep a brass or steel brush for the deck, heat-resistant gloves, and a long set of tongs. A squeeze bottle of olive oil, a small strainer for sauce, and paper towels round out the kit.
Learn Heat Management
Heat makes or breaks the first bake. Preheat longer than you think. Most portable ovens need 20 to 30 minutes to saturate the stone. Do not trust air temperature alone. Use an infrared thermometer rand target 750 to 900°F on the deck for Neopolitan-style bakes, or 600 to 700°F for New York-style pies. Learning to master pizza oven temperatures will make every style easier to perfect.
Watch the dome
A wood-fired flame should roll across the ceiling and lick the opposite wall. That arc browns the rims and melts cheese without drying it out. If the stone spikes too hot, let the flame ease for a minute or place a cold pan on the deck to pull heat. If the stone cools, run the flame higher for a few minutes and brush the deck clean.
Run a flour test
Dust the cooking surface with a pinch of flour as a quick check before launching the dough. If it smokes and turns black in a couple of seconds, you need a short cool-down. If it barely colors, raise the flame and wait. Small checks save pies.

Nail the Launch
Work with confidence. After placing the dough on the peel and adding toppings, get it into the oven within a minute. The longer it sits, the more it sticks. Before you step to the oven, give the peel a quick shimmy. If the round moves freely, you are ready.
If you feel a drag, lift an edge and puff a little air under the dough, then add a sprinkle of rice flour where it is stuck. Patch tiny tears with a scrap of dough. Do not use parchment at extreme heat, since it scorches. A perforated metal peel can help if you struggle with sticking, since the holes reduce suction.
Aim the front edge of the peel at the back third of the stone. A gentle forward push and a quick pull leave the round behind. Keep motions smooth, not forceful. Practice with a cold oven and a dough skin dusted with cornmeal until the movement feels natural.
Turn, Bake, and Finish Like a Pizzaiolo
Heat hits hardest near the flame, so you need to rotate. After 15 to 20 seconds at 800°F, slide the turning peel under the rum and rotate a quarter turn. Repeat until the rim shows even color. Total time runs 60 to 90 seconds for Neopolitan-style pies and 3 to 5 minutes for lower-temp bakes.
Read the crust, not the clock
Look for leopard spots on the cornicione, melted cheese with bubbles, and a dry underside with light char. If the rim races ahead, hold the pie near the mouth to finish the bottom away from direct flame. If the bottom races, raise the pie toward the dome for a few seconds to brown the top.
Rest the pie for a minute on a wire rack before slicing. Resting lets moisture escape, helping the crust stay crisp while the cheese stabilizes. Finish with clean cuts using a sharp wheel or rocker.
Work With Wood, Wind, and Weather
If you run wood, feed small splits consistently. Dry hardwood burns cleaner and keeps flames lively. Damp wood smokes and drops heat. Store fuel under cover with airflow. Bring a few splits indoors the day before a cook so they start dry.
Wind is not a friend of pizza
Wind steals heat and blows ash. Face the oven opening away from gusts. Use the built-in door as a shield during preheat and reheat cycles, then remove it for launches and turns. Cold air lengthens preheat times, so light the fire earlier and check the stone temperature more often in winter.
Plan lighting and comfort
Good task lighting at the oven mouth helps with color checks after sunset. Keep a fire extinguisher, a bucket for ash, and a safe place for hot tools near the station. Clear kids and pets from the hot zone before you start.

Clean Up and Maintain the Oven
Tend to the deck while it is warm. Brush away char and flour after each pie. At the end of the session, let the oven cool to warm, then scrape stubborn spots. Avoid water on the hot stone, which can crack it. For heavy build-up, run a short hot cycle the next day to carbonize residue and brush again. Simple pizza oven cleaning tips can help keep your oven in top shape for years.
Empty ash only when fully cold
Store ashes in a metal container with a lid. Wipe soot from stainless parts with a gentle cleaner and a soft cloth. Check gaskets, regulators, and hoses on gas units every few cooks. Small maintenance steps keep the heat even and baking predictable.
Cover the oven when not in use
Moisture and dust rob performance and shorten the life of the stone. A snug cover and a dry storage spot protect your investment and make the next cook start faster.